Hannah Overman Koch

Friday, January 24, 2014

Studio Exploration: Tessellations


Tessellations 

I am working in my studio on tessellations.
This exploration is a project for my art education class at East Carolina University;
Art 3851 with Dr. Quinn
Spring 2014

Dr. Quinn provided the tessellation lesson plan and I get the pleasure of exploring this creative problem!

What will be my aesthetic solution?

Materials:
3x3 inch squares -card stock paper
12x12 inch paper
colored pencils
scissors
tape
pencil

Here are 3 types of tessellations I worked through-

Translation

I drew one continuous line on the card stock paper.

Cut the paper on the drawn line.
(Sharp points are challenging to cut!)

Then slide the cut section and tape it together.

Trace the shape onto the 12x12 inch paper.


Rotation

I drew one continuous line on the card stock paper.

Cut the paper on the drawn line and rotate the cut section 180 degrees.
Tape the 2 pieces together.

Trace the shapes onto the 12x12 inch paper.


Glide Reflection

I drew one continuous line on the card stock paper.

Cut the paper on the drawn line.

Then slide the cut section and flip it 180 degrees.

Trace the shape onto the 12x12 inch paper.


Then I had to make the decision which one to choose....


I decided to do the glide reflection to continue the exploration!

I began filling the paper with smaller shapes and designs.
I was required to add geometric and biomorphic shapes.


With each line I drew, I tried to continue the pattern throughout the paper.

Once all my shapes were added in pencil, I drew over them with a black pen.

The completed 12x12 inch paper with black outline.

I erased the pencil marks to clean it up.


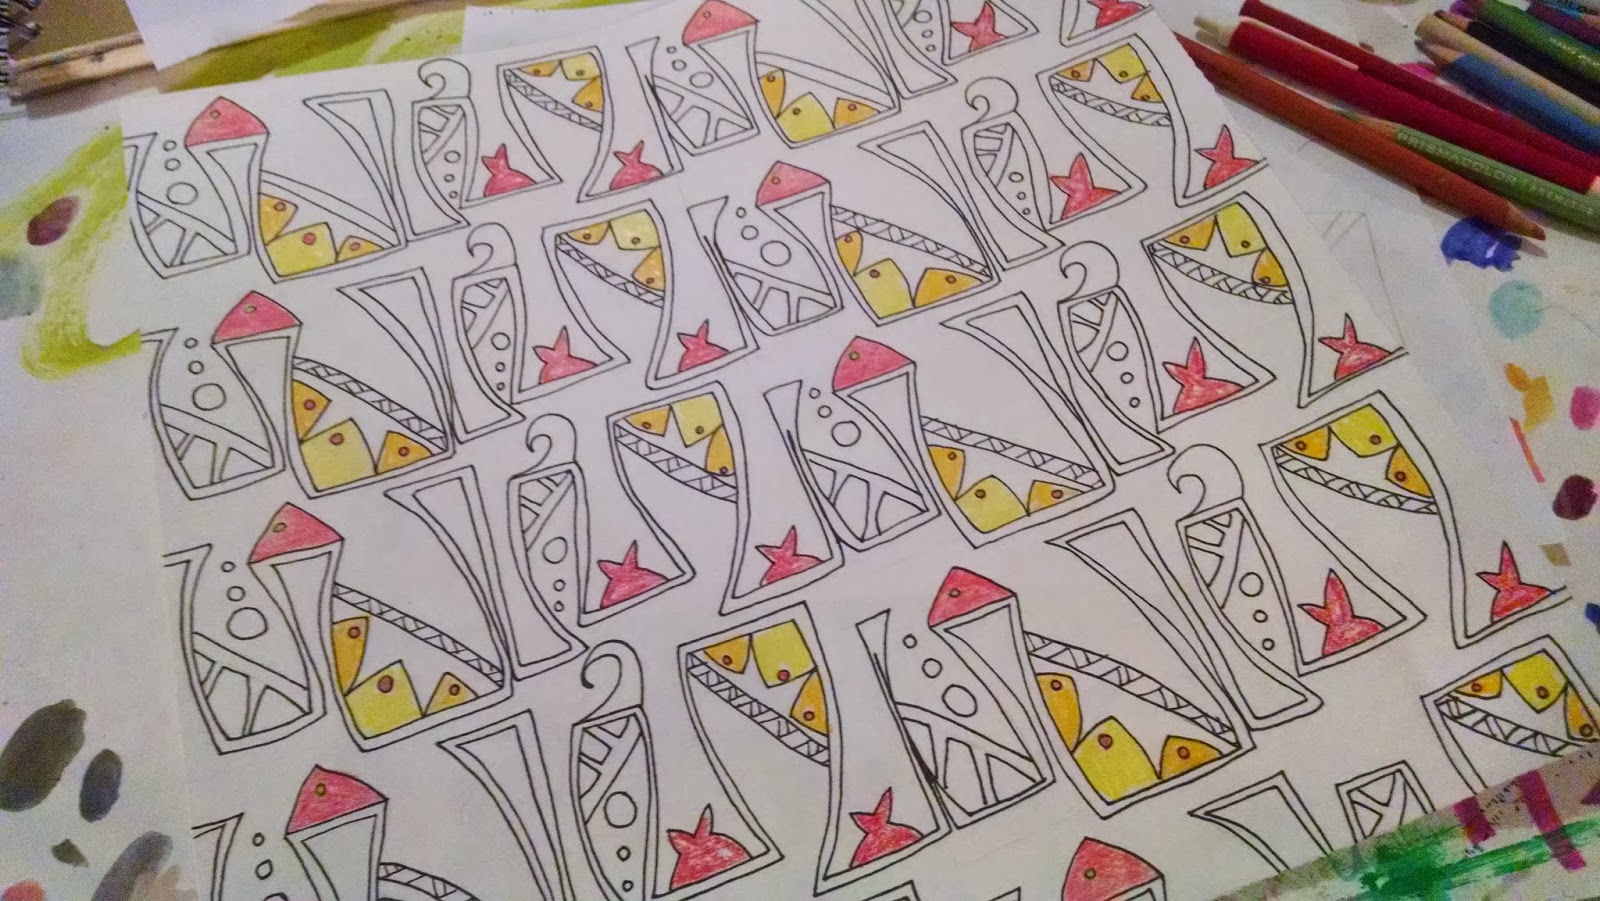
Now it is time to add some color!

Using colored pencils.

Any ideas on my biomorphic shapes?


Detail of Glide Reflection


Fish in Boats
Finished Tessellation

This exploration was fun and challenging to think in terms of line transformation.  
I found that what I thought it would look like, really didn't look like that at all!


Check this link for more information on tessellations:


M.C.Escher's work with tessellations is inspiring and a great website resource:


exploring my creativity and doing homework (that I love) at the same time on this artist holiday,
hannah


Tuesday, January 21, 2014

Where Have I Been...


Among the darkest pines,

capturing the brighest winter rays,
 
sleeping near screech owls,

living vulnerably, 

appreciating the essence of God's beauty,

exploring and pushing myself into more artistic experiences

and

pushing myself even further to become a certified art educator.


and the journey continues on this artist holiday,
hannah


Tuesday, October 22, 2013

Heart Ring Tutorial


I have been teaching a jewelry making class to
4th and 5th grade girls this fall!

I have enjoyed getting back into jewelry making
and seeing their adorable faces light up with
all little goodies they have made!


One of which I want to share with you-


the Heart Ring

This is a sterling silver version I created.


Now let's make this ring without
using a torch-


Here's how...


Materials needed...

Craft wire 
Ruler
Hammers
Mandrel 

Round nose pliers
Needle nose pliers
Flat nose pliers
Wire cutters

**Please note these are the tools I have on hand.  
If you don't have exactly what I list here use what you have.

Maybe the hammer handle could be the mandrel,
and needle nose pliers can do all the work, if necessary!

STEP 1

Measure craft wire to 6 - 6 1/2 inches

Depending on the size of your finger you can go larger and overlap the ends.
Too much smaller than 6 inches and the rings are tiny.

Cut wire and file wire ends.

When filing; the general rule is to go in one direction.
Make the ends smooth and somewhat rounded.


STEP 2

Using your fingers fold the wire in half.

Squeeze the center as hard as you can.
Pliers can help here too.


STEP 3

Begin to pull apart the wire ends.

Flat nose pliers or needle nose pliers 
can help the wire to stay flat.

And begin to shape it with your fingers into
a heart shape.

Round nose pliers or needle nose pliers can help
you achieve your desired heart shape, but not necessary.
Fingers can do all the work here!

Once your heart shape is complete, 
cross the remaining wire over each other.


STEP 4

Begin to gently twist the wire on itself.

You are looking for the wires to be even and simultaneously twisting.
Untwist and try again, if needed.  Most craft wire will be forgiving for a few tries!

Continue twisting. 


STEP 5

Your ring should now look like this!

A heart on one end and twisted with
approximately 1/4 - 1/2 tail on each side.


Using your round nose or needle nose pliers
create a small loop on the end.


Repeat this process with the other side.

This will ensure the ends are tucked away
and your finger is safe from injury.


STEP 6

Shape your ring around a mandrel or something similar in size.

Using a leather mallet can help
without marring the metal so much.

Hammer the heart shape to flatten the wire some and
it will also give it a sparkle in the light!

It also helps the back of the ring feel better on the finger.


Adjust it with your fingers (pulling or pushing gently)
to get just the right size for your finger!


A little tidbit on craft wire...

Pictured here is copper wire and red color craft wire. 
For this project I used 18 gauge copper wire.
Other gauges can be used.  But it needs to be strong enough to hold shape.
Craft wire can be bent easily and is mostly forgiving, but will weaken and break
if bent too much in one spot.

Sterling silver wire and cooper wire work great for this kind of project too.


These rings were made with a variety of colored craft wire.
Some stores carry a large variety of colors!


Faith and Love


sharing a little metal love on this artist holiday,
hannah


Tuesday, October 1, 2013

Zen Doodle Book Publication


It is with great pleasure that I share
I am a contributing artist to...


Zen Doodle 
Tons of Tangles

Published by North Light Books
Edited by Tonia Jenny and Amy Jones


This is a wonderfully done book composed of an incredibly wide variety of doodling ideas.  
Not only is each page a visual inspiration, each contributor has shared prompts for getting started and continuing their creative process.  Though guidelines from each contributor is listed, as the artist, you are able to interpret it as you wish and convey your own doodle path!

I am thrilled and honored to be apart of a such an inspiring collection!
Thanks to the editors for their hard work and care for the creative process.


And to top it off-

My image made the back cover!!
(3rd from the left)


Paddle Through Life


Fish in Flight


Minimum materials required for doodling:
black pen and paper


Check out the website for more information:


sharing an exciting life moment of this artist on this artist holiday,
hannah