Hannah Overman Koch

Thursday, November 17, 2011

Baby Jesus Ornament Tutorial

   
     Recently, I was trying to come up with a nice Christmas ornament to make with the 2nd graders I work with on Wednesday's nights at our church. I just wanted to do a baby Jesus ornament, that much I knew.   I did some research and could not get satisfied on anything.  Nothing was hitting me at all.  I discussed this with our children's minister and she was telling about this beautiful baby Jesus ornament she had made years before.  I loved the idea, but I didn't have several of the items she used.  So, finally I decided to try to make this adorable ornament with what I had on hand!  With thinking outside the box a little, I figured it out.  Below is my version of a...


Baby Jesus Ornament


The following instructions are to make a very special handmade ornament with your family, a children's group or for your very own tree!  Hope you find it as adorable as I do!


Materials list:  
3/4 inch wood disc for face
3 inch square batting
fabric scrap approx. 1 inch in width and at least 10 inches in length, with ripped edges
 ripped sandpaper,100 grit shown here
ribbon for hanging approx. 7 inches 
Brass wire for halo (optional)
colored pencils 
white glue
hot glue gun, glue sticks (please follow safety instructions)


Take your wooden disc and lightly shade whatever background color you choose and simply draw 3 curved lines.  Two for the eyes, delicately closed of course, and one for the mouth, with a slight smile. 


I used light skin tones for the background and dark brown for the eyes and mouth.  Or simply leave the wood natural.  Once this step is complete, set the wooden face disc aside.
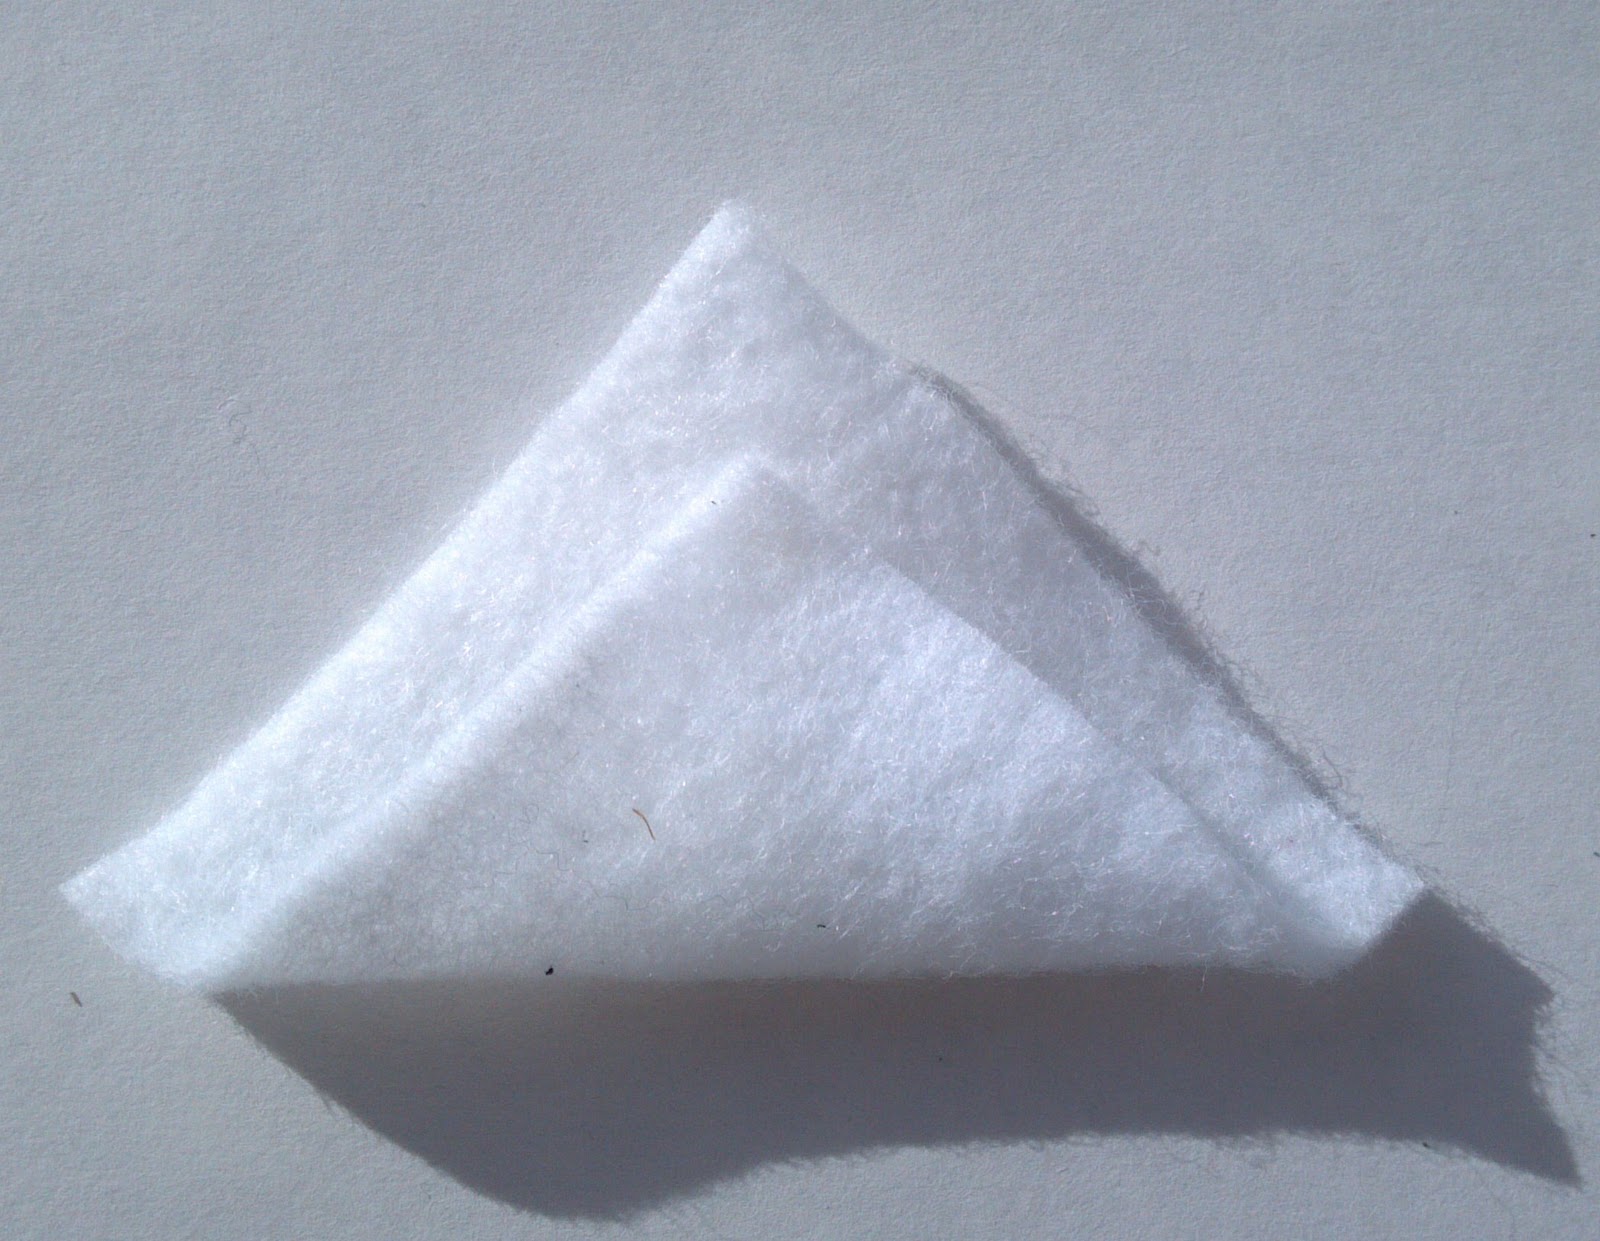

Batting Folds

Your wooden disc face will be inserted on top of the bottom point (after folded), with the back point exposed behind it.  However, I do not permanently insert the face until the end.  But use the face as a reference on your folding in the next 3 steps.

**You can use white glue for these steps or hot glue.  
Doing these steps with children, white glue, of course.  It will be reinforced with the fabric in later steps.

Step one:  Turn the 3 inch square batting on point, apply a small dot of glue and fold the bottom point to the top point, leaving some space for the wooden face disc. (pictured above)


Step two:  Apply a small dot of glue to the right corner.  Fold the right corner over to the left.    Remember to leave space for the wooden disc face.  


Step three:  Apply a small dot of glue to the left corner and fold the left corner around to the right, wrapping around to the back to make a swaddled blanket. At this point, you can check how your wooden disc face will sit snugly within the batting pocket you just created.  Adjust accordingly.


Fabric Tying


I used fabric I had on hand that I thought would be most appropriate for the theme of this ornament. I went more for subdued colors and patterns, less bright and contemporary colors.  Use whatever strikes you!

Lay the fabric strip out with the swaddled batting on top and wrap once around the swaddled batting and bring end to meet on top.


Tie a square knot or double knot on top of the swaddled batting with the fabric.  Once tied, trim the fabric ends with a seam ripper.  Adjust swaddled batting to your liking.


Sandpaper Bedding


The sandpaper is to resemble the hay bedding Jesus was laid on in the manger.

Simply rip your sandpaper by hand anywhere from 3 1/2 to 4 1/2 inches in length. Apply small dots on the back centers of two of the strips.  Attach the 3 strips together and fan out so they will cradle the baby. 
**This is another step where you can use white glue with children.


Ribbon application:

Bring your ribbon ends together and hot glue to center of rough side of the sandpaper. Once complete, set aside.


Brass halo instructions


I used 16 gauge brass wire, cut approx. 7 - 8 inches.  Next you will need to wrap something small and circular, like a bottle neck.  (Brass wire can be hard to bend by hand in this thick gauge - bring on the elbow grease!)  Bring the ends of the circle together and bend them down.  I used round nose pliers for this step, but any small pliers will do.  Straighten the ends of the brass wire, trying to keep them as close together as possible and trim if necessary. 


With a hammer and steel block or another hard surface to hammer on, flattened the halo slightly.  This step can be optional as well.

Another alternative for a halo is pipe cleaners!


Final Steps:

**Hot glue needed for next steps**
If you are doing this activity with children, these are the steps adults should complete.


Apply hot glue to ends of brass wire and insert into swaddled batting. 
Apply hot glue to the bottom back of the wooden disc face and insert into swaddled batting pocket.  Adjust halo and face accordingly.

The photo above shows the step before assembling the baby together with the optional halo and swaddled blanket.  Simply insert wooden disc face by instructions above if you chose to leave out the halo.  (Either way it's adorable!)

Turn the baby ornament over and apply a generous amount of hot glue on the fabric portion.  Finally, adhere the baby ornament to the sandpaper and ribbon component, you did a few steps earlier.


And there you have your very own Baby Jesus Ornament!


Other options for this ornament could be;
baby's first Christmas (minus halo and sandpaper)
Symbolize each grandchild for a Grandparent's tree.  Simply individualize each grandchild through the fabric choices.
Angel (replace the sandpaper with wings you created or angelic looking silk leaves!)


handmade ornaments for the young and old on this artist holiday-
hannah


Friday, October 21, 2011

She moves on...

While faced with another rejection, I an happy to report that rejection does not bother me like it used too.  I pick my head up and move on to my next artistic adventure.  However, I must share that when I got the rejected painting back home, I promptly painted it hot pink!!!

And she moves on....

..... to drawing.  Yes, the task I seem to put at the bottom of my art-to-do list.  Well it made a jump to the very top and I am so glad it did. It is a quiet activity, that takes time and concentration, something that I do not always give my creativity.  Lesson learned there!  It seems everything lately is rush, rush and I needed an activity to counter-balance all that going.  It worked.  Now, in art school, drawing from photos is not the correct thing to do, much less magazines.  You should draw from models and real life.  Well, not possible for me at this time, I decided to go against the grain on that one and just try to hone in on my skill.  Below are my examples-


Sketches from a magazine..


Materials used: sketch pencils, student quality drawing paper

A bit of a challenging angle.  But I enjoy drawing the side view of her face.


I think she is too shaded, so the next two I tried to shade a little less, but still trying to give the drawing depth.


Tough toes on this one.  Who knew flat shoes and the angle of her foot would be such a challenge!  Something still isn't correct with her waist to me, but I moved on.


I like the back foot better.


I believe I captured her stance in this sketch.

I enjoy it so much when correct angles collide with curvy lines!

Taupe Toes - my favorite so far!


draw, draw, drawing on this artist holiday,
hannah


Monday, October 3, 2011

Daydream

I submitted a painting for the opportunity to get into the White Show at the Visual Art Exchange Gallery in downtown Raleigh!  This is a juried show and results will be posted in a day or two.  The dominant color should be white in all submissions.  Opening reception this Friday night.

I titled my painting.... 


Daydream

16x20
Materials used:  gesso, acrylic paint, mixed media (cheese cloth, soft pastels, charcoal, pencil)


Trying to establish texture, depth and subtle color


It was more of a challenge to keep white the dominant color than I originally thought.  So much depth can be created with color.  Another lesson learned by participating in calls for artists!!

I enjoy the pale blue, magenta and white combination.  The black markings finish it off.


A simple black frame would look fantastic around it.


hok 2011 subtle in the corner, not to distract from the rest of the painting.


still learning lessons and trying to get out there on this artist holiday,
hannah

Friday, September 23, 2011

Sun and Sea

     This is one of many ideas I have about what I would like my "art quilts" to look like.  A real attempt for me to incorporate my hand dyed fabrics, commercial fabrics and all the "treasures" I collect wherever my path may take me!  (Truth be told - I am one of those people who looks at the ground as I walk, looking for little pieces of metal and non-gross items to pick up and use in my artwork!)  It may be the texture that catches my eye, anything round or just simply something rusty.  Read here about how I would go with my daughters on treasure hunts and end with what I titled a "Discovery Vase".
     After following Deborah Boschert and being so inspired by her work.  I decide to take the plunge and create my own art quilt with my various ideas and found objects.  Mrs. Boschert is part of the group Twelve by Twelve, where her and 11 friends create 12x12 quilts on various themes every 2 months or so.  They just compiled a book titled Twelve by Twelve The International Art Quilt Challenge.  Click on the link and you will see it on the right side.  I purchased it recently and it really is a feast for the eyes!  So many interpretations!!  Very inspirational!!!
 

And here is my first real attempt at an art quilt....  still so much to learn.....


Sun and Sea

12x12

Materials used:  hand dyed fabric, commercial fabric, burlap, silk gauze, dark-annealed steel wire, buttons, shells, rocks, various beads, fabric paint, various sewing and embroidery threads, twine


A detail photo of the "sun"


Another detail photo of an attached treasure


Sea written in wire and attached with twine


Porous shells and pebbles.  Some thread trash also used. 


Most wrapped in wire and or hand dyed fabric.

back view


Self critique:  Very raw, which has a good appeal but still needs a more polished look.  Binding is troublesome.  Is the theme too obvious, needs more subtlety?  Not enough variety, too many horizontal lines maybe?  Sleeve too long in back.  Needs more texture with hand stitching.  Nice attachment techniques.  Needs more free-motion quilting.

Rebuttal:  I strongly dislike binding and is probably a large part of why I have taken this long to create an art quilt.  I also find difficulty in placing the sleeve on the back in just the right location.  I enjoy the gray background and love the raw edges.

I am happy to have a finished piece under my belt and know that I am one step closer to gaining more knowledge and experience in this interesting world of art quilts and "assemblage" if I may.


Looking for the small treasures in this world on this artist holiday,
hannah


Monday, September 19, 2011

Some Summer Pictures

My summer travels did not take me around the world or even around the country but I did get out none the less and enjoyed the patterns and textures all around me!  Her are just a few...


Avon, NC
June

nothing like a beautiful wave


colorful sunfish sailboat out just a bit


nice fire on the beach

kids looking for sand crabs with flashlights

My Aunt Rosie's shell garden

a shell waiting just for me on my morning run

had to be quickly sketched!


Washington, DC
August

The beautiful ceiling at the Smithsonian American Art Museum

A favorite artist of mine - Wayne Thiebaud
Jack Pot Machine

just stunning in person


Lloyd G. Schermer
An American Puzzle


hard to say good bye to such a fun summer!


trying to catch the last rays of summer on this artist holiday,
hannah

Monday, September 12, 2011

30 pantry sketchbooks


I decided to use my pantry sketchbooks ..


30 of them...


for journals/memory verse dwellers and journaling/drawing.

I am helping teach in the 2nd grade class during Wednesday night church meetings this school year.  Our time is limited and I thought the pantry sketchbooks would be a great idea for many reasons;

1.  Practice writing skills by writing short verses from the weeks' lesson
2.  Each child designs their own cover
3.  Teaching the thought "use what you have already"
4.  Explore journaling and drawing
5.  Hoping the children will thrive with having their own personal sketchbook to go to every week!


Each was bound with black acrylic yarn.  Each book has 10 blank sketchbook pages.


Week one results:  I am happy to report that they were received very well and the creativity has begun!


taking a simple idea and running with it on this artist holiday,
hannah